Hello all. what I have here is a 45 minute upgrade that I feel anyone can do. This is simple and direct. If you can run a screwdriver you can do this with half your brain tied behind your back.
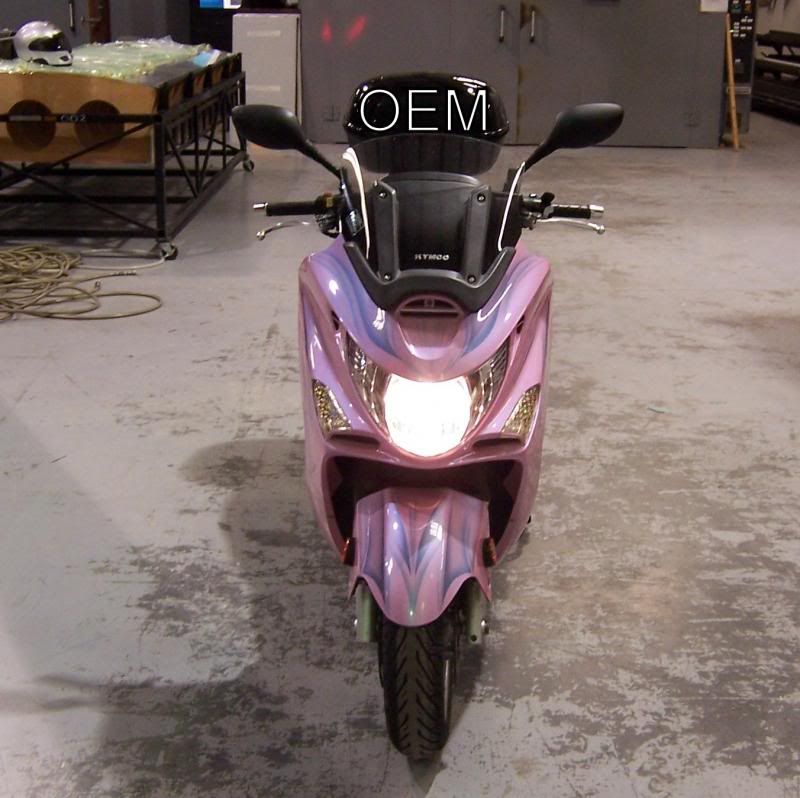
Here is the scooter with the OEM headlamp bulb installed.
First thing you have to do is locate all the screws that hold on the front faring of your bike. To make this easier I have photos of their locations. Please remove the front one last and install it first when going back together. Line up all the guides properly when going back together.
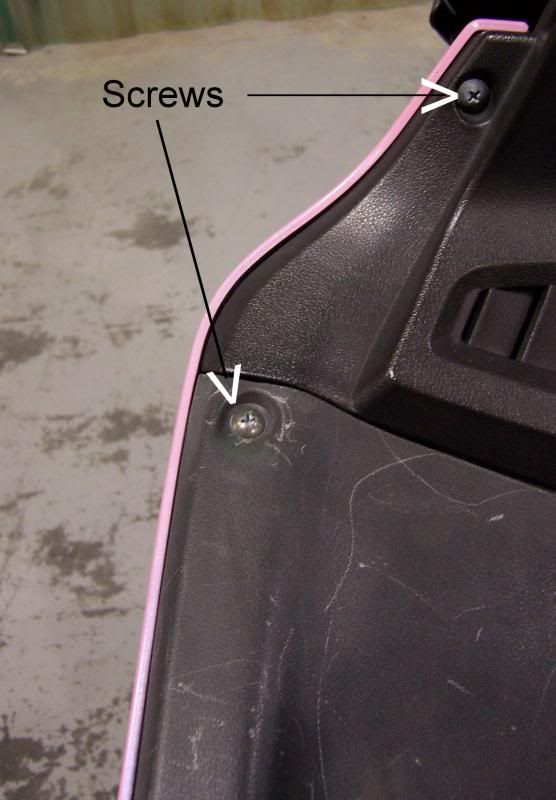
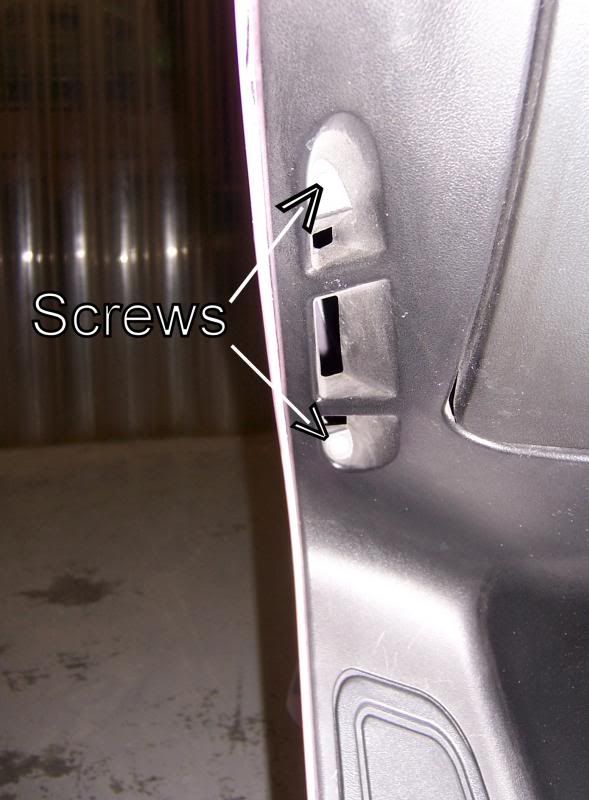
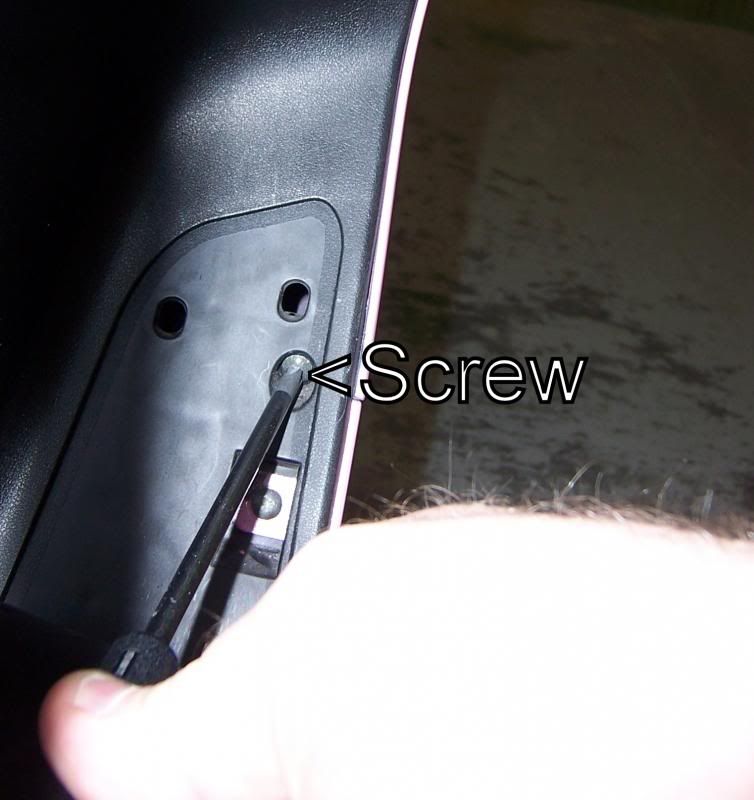
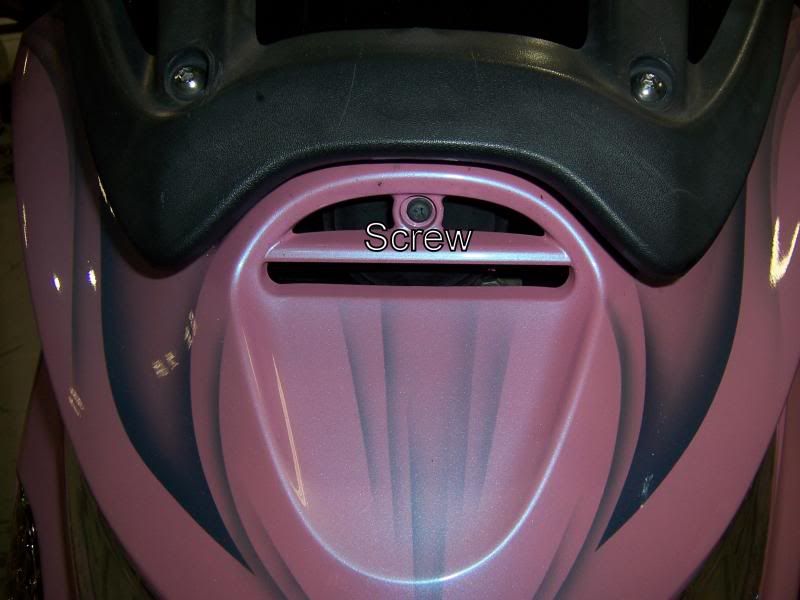
Be careful with the screws. I did brake one of the plastic threaded holes while tightening it too much. So use caution.
Now unplug the harness and then take your headlamp assembly to a large bench to work from. So here is the back side of the faring looking at the rear of the headlamp assembly.
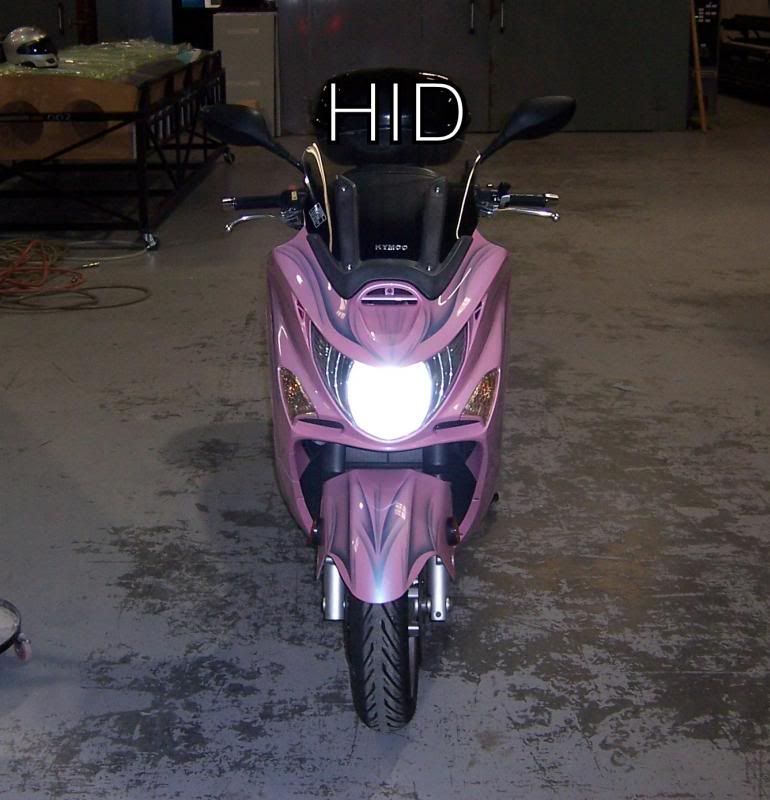
Here I have installed the HID bulb already but you get the idea.

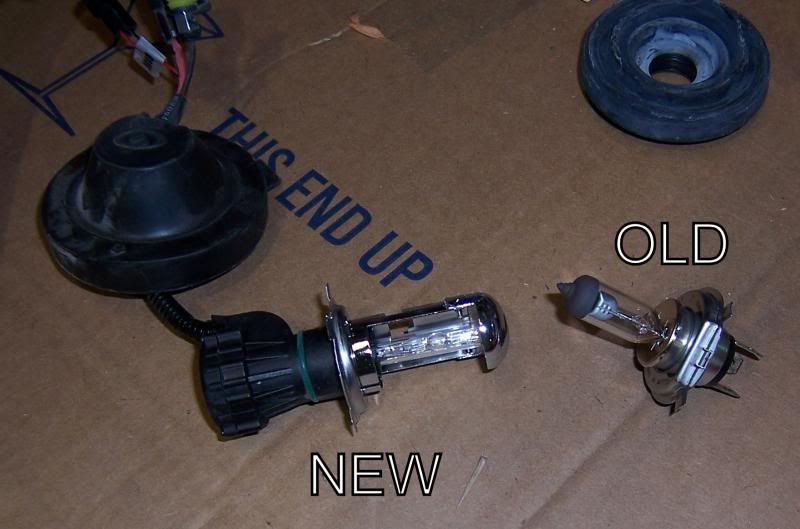
Here are the new and old bulbs going in and the next photo is of the wire harness that comes with the HID bulb. The bulb fits like a glove.
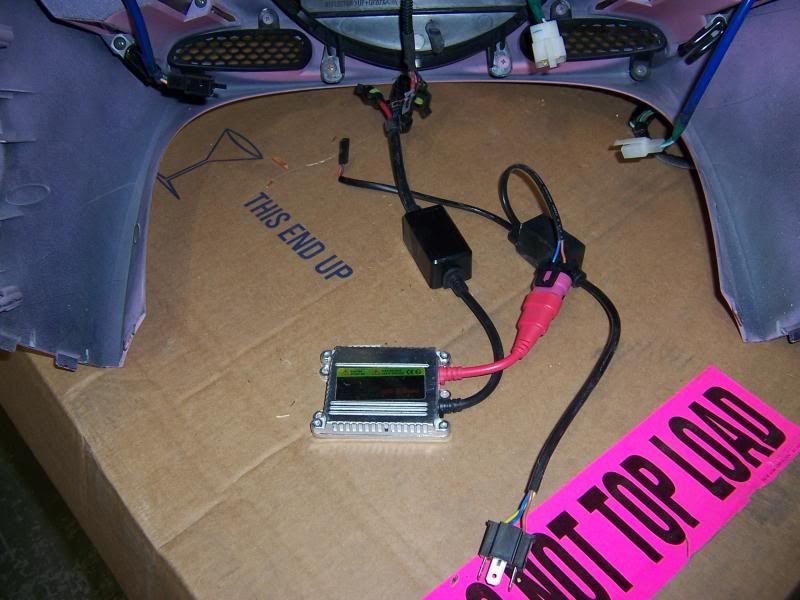
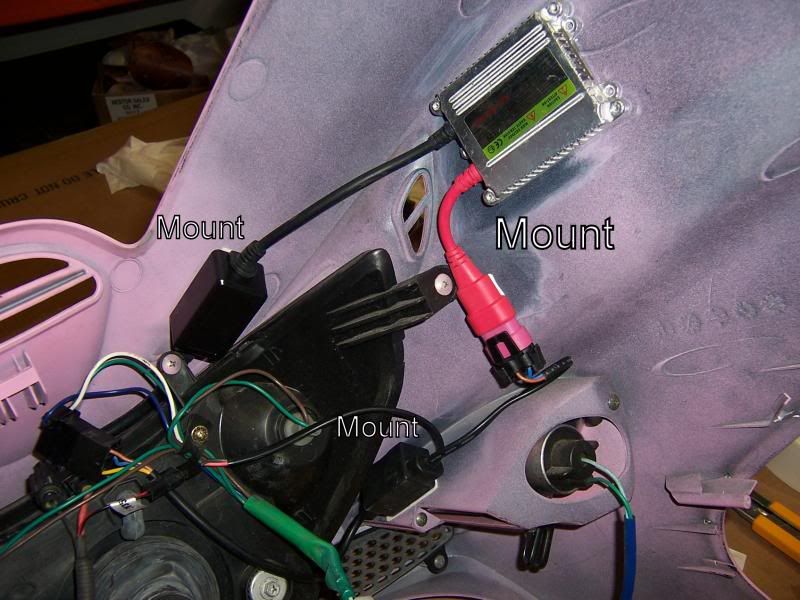
This is how I laid out the harness in the faring. I had to try 3 different times to get it right. The sub frame parts on the bike kept on getting in the way so this is where everything ended up.
Here is the front view once reassembled.
Now if you look here you will see the beam from old first then the beam from new.
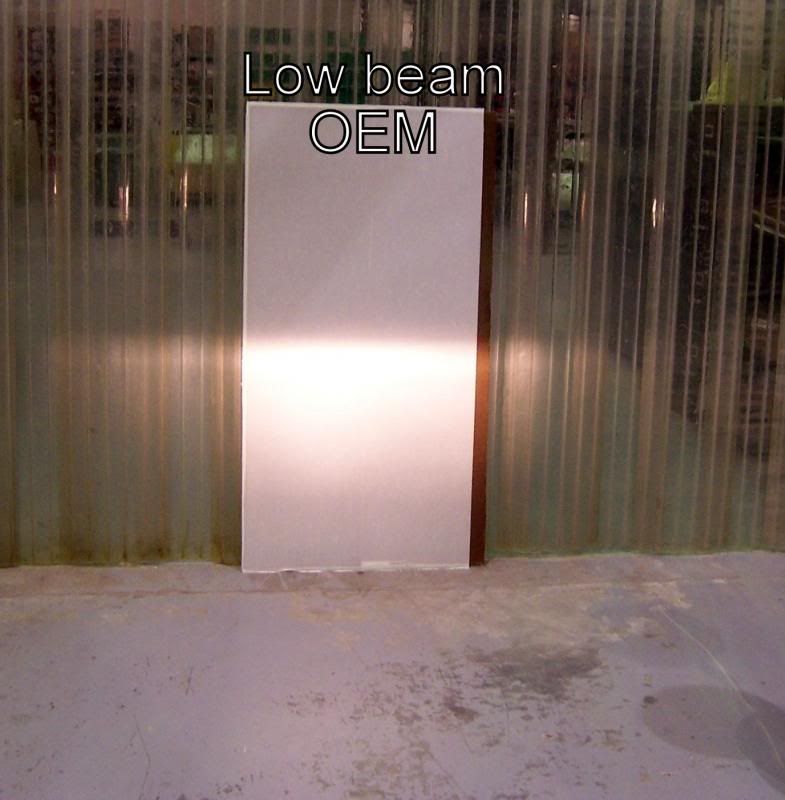
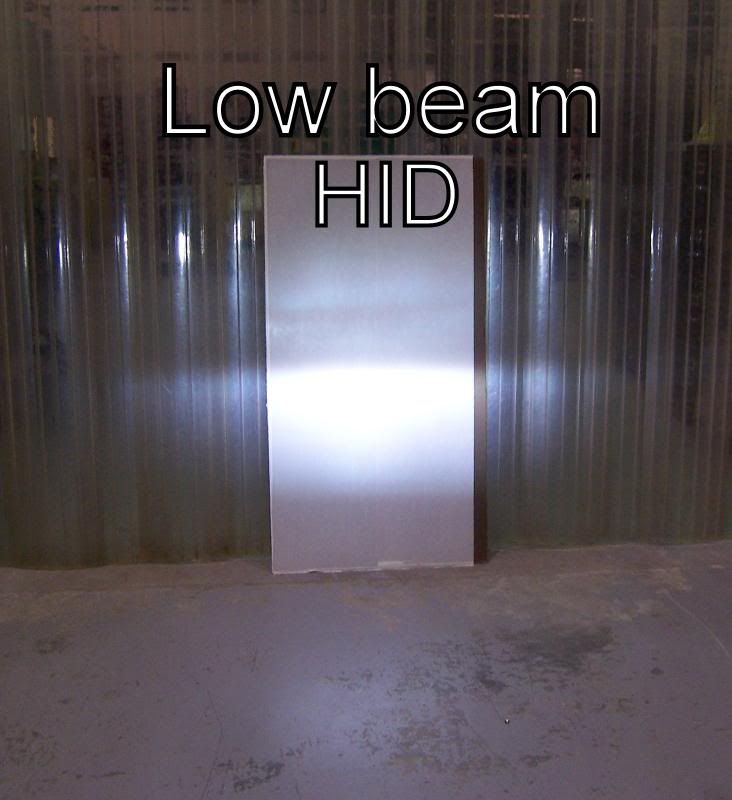
These photos were take about 45 minutes apart inside my shop at about 11am and 11:45am. Bright and sunny outside here in Florida and no lights on in the shop. all ambient lighting is from skylights.
Here is the front view side by side.
Here is a link to the videos I shot both are less than 2 minutes. this is really a very easy install and the difference will be huge. I will post photos and videos during the night of the finished product.
! No longer available! No longer availableForgive all the background noise I was running the autoclave during all this and it is noisy even more so with the heaters on.
Here is the euro style headlamp housing. I plan on changing to this headlamp when I get a good price on one.
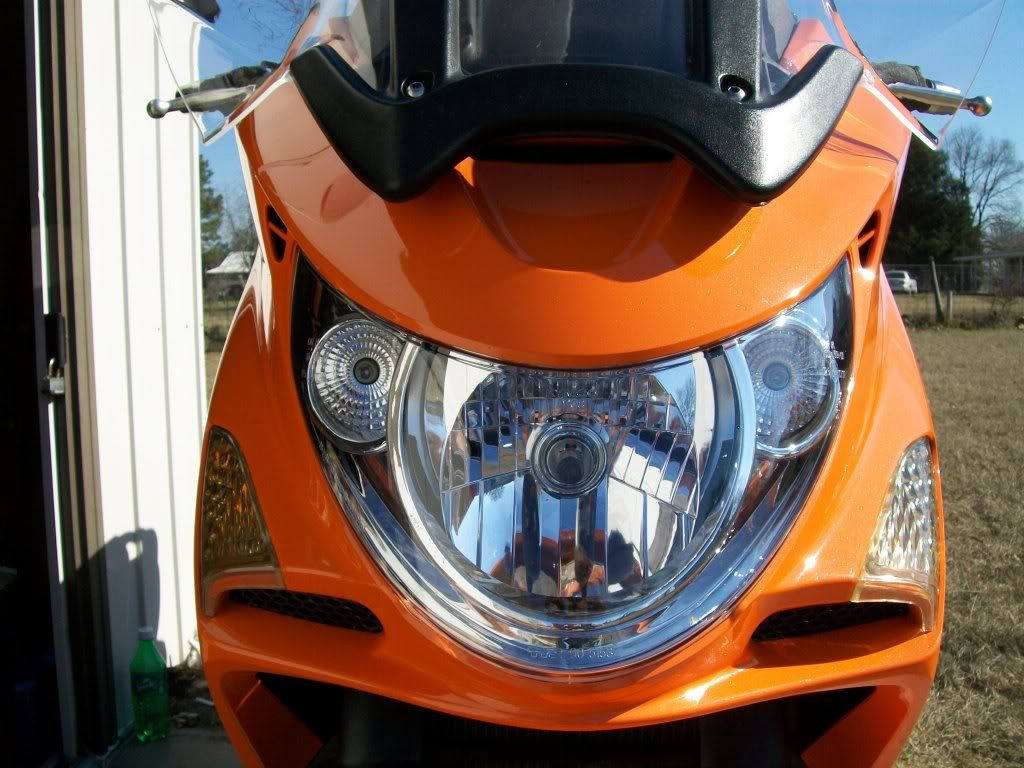
This is not my image. I am using it only to show the euro style headlamp housing.
In any event have fun and do this upgrade to your bike. Any questions don't hesitate to ask.


