Show Posts

This section allows you to view all posts made by this member. Note that you can only see posts made in areas you currently have access to.


Messages - RURC

Pages: 1 [2] 3 4
16
Xciting 500 / My 2009 500 is acting up
« on: January 11, 2018, 08:27:11 PM »
Well here is my problem, when I shut the bike off something is remaining energized. The only way I can keep it from killing the battery overnight is to disconnect the battery.

Here is what happens:
I drive the bike,
I get to my destination,
I turn off the bike,
The bike shuts off as normal but, the oil pressure light comes on,
If if put the kick stand down the kick stand indicator comes on,
If I put it back up it goes out but the oil light remains on.

I only mention the kick stand light to show that other systems are operating normal. I know that the kick stand light should come on with the initiation in the off position.
When I start the bike the oil light goes out as it should.

I am sure there is more but I have not seen it as of yet. I feel there is a relay that either is not releasing or that the ignition switch is somehow not operating right and is keeping something on.

Has anyone seen this before? Does anyone have any ideas as to what may be causing this problem? I am looking for a direction as this weekend I will be pulling the faring and starting to get it fixed.

Any and all help is much appreciated.

17
Xciting 500 / Re: I need better shocks - Xciting 500 '09
« on: April 20, 2017, 05:00:05 PM »
Then you haven't seen the price on something like King Coil overs for a Jeep/truck. It's all relative. The Ikon ones are made with whatever spring rate you need but if you are looking for reservoir shocks expect to pay, I just can't see a need for them for this application short of cool factor.

I just (3 weeks ago) bought a full conversion set of 4 KYB racing adjustable coil over gas shocks and struts for my 87 Pontiac Fiero and payed $466 plus shipping. I understand it may be relative, but it is a scooter not a Suzuki RR. Which I can get good reservoir rear shocks for that cost $350 for the pair.

$230 is just too much no matter how you cut it for one scooter shock.

18
Xciting 500 / Re: I need better shocks - Xciting 500 '09
« on: April 20, 2017, 11:40:48 AM »
Well I found the Kymco ones.

They are G52400-LBA2-E00-B0 (the B0 is the Red color) LEFT side
They are G52400-LBA2-E10-B0 (same color thing) RIGHT side

No pricing yet but I will let you know.

Looking for others.

$229.00 EACH
Are they freakin nuts?


I bought a full set of KYB racing coil overs for my Fiero for the amount that 2 of these shocks would cost.

There has to be a better deal out there somewhere and I am looking.

19
Xciting 500 / Re: I need better shocks - Xciting 500 '09
« on: April 19, 2017, 08:28:20 PM »
Well I found the Kymco ones.

They are G52400-LBA2-E00-B0 (the B0 is the Red color) LEFT side
They are G52400-LBA2-E10-B0 (same color thing) RIGHT side

No pricing yet but I will let you know.

Looking for others.

20
Xciting 500 / Re: I need better shocks - Xciting 500 '09
« on: April 19, 2017, 07:58:42 PM »
Some of the companies I've heard of through the Burgman forum are Ikon and the I think it was French air shocks Fournales.

http://www.ikonsuspension.com/
https://www.ikonsuspensionusa.com/
http://www.mawsolutions.com/html/fournales_shock_absorbers.html

Found an old thread on here about side cases.

http://www.kymcoforum.com/index.php?topic=1470.0

Top case mounts.

http://www.shadonline.com/category-s/554.htm
http://tourandride.com/bike-specific-hardware/kymco/xciting-250-500-05-12

Thank you so much for the time.

I found that link on the side mount but the link seems dead. I just get an empty screen.

On the top case mount I have the GIVI mount and case.

On the shocks those all seem to be stock type shocks. It is not that my shocks are bad, I am just a big guy.

21
Xciting 500 / I need better shocks - Xciting 500 '09
« on: April 19, 2017, 12:33:44 PM »
Hello hello hello. I searched and nothing I saw gave the answer I was looking for.

So I saw this video a while ago:


In this Kymco video the easy to look at Stacy Haynes installs a set of gas charged shocks on a 500 just like mine. But no where does she give a part number or any real information on the shocks. I call my local dealer and they think I am on drugs. They tell me it does not exist.

OK. Well I really need to upgrade my shocks. Being a larger rider I have a tendency of bottoming out on bad areas of the road. If you have any links or ideas on rear shocks please tell me.

I am also looking for a hard side saddle bag mount system for the same bike. I have only seen photos of prototypes but nothing for sale.

Any how thanks in advance for your help.


22
Xciting 500 / Re: Polini clutch, anyone?
« on: April 19, 2017, 12:16:41 PM »
Both belt and rollers as per service manual should be replaced after inspection if there's wear.
It's very likely that your rollers have flat spots and I'd replace them (with Dr Pulley sliders of course but, you'd get lower revs at those 70mph you tend to do).
OEM belts by Kymco are amazing re: quality and longevity, I'd stick with them (and I always have).

Look into 30-31g Dr Pulley sliders which will give you a better acceleration and lower revs at higher cruising speeds (haven't gotten them yet myself,
but I've had them in all other scoots I owned before). It transformed my DT300i which had a crappy stock CVT setup (the XC500s setup is IMHO pretty good).

Thank you for your advice. I just rolled 22500 miles on the original stuff. Are their any really good videos or instruction guides on doing this job? I am very mechanically inclined but I have never touched a CVT like these have.

23
Xciting 500 / Re: LED lighting upgrade
« on: April 18, 2017, 07:54:20 PM »
The Burgman has them on the fender area mounted to the brake caliper mounts. Just need to have flexible enough wire and slack for suspension movement. I also like using the poly braided sleeving (like the Chinese finger puzzle) over the wires.

https://www.techflex.com/prod_nyn.asp

It looks like in the photo that it is mounted on the fairing.

But anything going outside needs the braiding. I am just going to deal with all that when I have to take everything apart for painting.

I love that 700 motor.

24
Xciting 500 / Re: Polini clutch, anyone?
« on: April 18, 2017, 07:50:02 PM »
Always 10% as per their recommendation.
Did wonders for my DT300 (11 to 9 seconds from 0 to 60).
Still haven't used them in the XC500, but I will.

XC500s CVT is better setup then most I've tried stock, and at WOT it already gets above the max torque value
revs so I'm not expecting a big jump here, but the lower revs at higher speeds will be nice too.

I'm on 33g stock, will be going to 31g and not even looking back if it's not perfect, I'm done with tinkering. :)
I don't need "as fast as it gets", I'd rather have a small bump in performance and keep lower revs.

I came from a 100hp bike to this, it's never going to come even close so.. I'll just enjoy a smooth ride
(hence the worrying about the clutch being too aggressive of a mod).

Cortez,
I have a XC500 (older carb version) and I am getting ready to replace the belt. I was wondering if I should be looking at replacing the rollers / sliders also at this time. Mine is OEM stock and except for cleaning by the shop during maintenance it has never been apart. The OEM belt has lasted very well for me but is it the best one to get? That goes for the clutch and rollers / sliders also.

My riding is mostly to and from work but I do a weekend ride of a couple hundred miles almost every weekend. This is on the highway so I need to be 70MPH at those times. I dont want to mess up the reliability of this scooter but I just want to do the next best thing.

Any help you can give me will be very appreciated.

25
Xciting 500 / Re: LED lighting upgrade
« on: April 18, 2017, 07:35:05 PM »
I did something similar to my Burgman 650 years ago and have started upgrading the lighting on my MyRoad 700i and recently acquired Aprilia Atlantic 500. I started with LED bulbs from Super Bright LED's but now there are other choices that are good at a better price. I bought a lot of LED bulbs before I found decent ones (there is a lot of cheap crap out there). Now you can buy a pair of 1157 red ones at Walmart that are about as good as they get, the Sylvania Zevo 1157R.

https://www.walmart.com/ip/Sylvania-1157-ZEVO-LED-Bulb/47056249 for $20 a pair!

For a flasher on my Burgman I used the two wire on from Super Bright LED's.

https://www.superbrightleds.com/moreinfo/flashers-load-resistors/lf1-s-flat-universal-motorcycle-electronic-flasher/787/842/ .

I have also replaced all the reflectors with 2 way LED lighted ones, most recently from eBay.

http://www.ebay.com/itm/111868810698?_trksid=p2057872.m2749.l2649&ssPageName=STRK%3AMEBIDX%3AIT
http://www.ebay.com/itm/111868811212?_trksid=p2057872.m2749.l2649&ssPageName=STRK%3AMEBIDX%3AIT
http://www.ebay.com/itm/111868811252?_trksid=p2057872.m2749.l2649&ssPageName=STRK%3AMEBIDX%3AIT

These are wired to light when the bike is turned on, the side lights flash brighter with the turn signal, and the rear lights brighter with the brake lights. On the Burgman 650 mirror mounted turn signals I did a dual conversion like you adding new low profile sockets from eBay.

http://www.ebay.com/itm/131367337546?_trksid=p2057872.m2749.l2649&ssPageName=STRK%3AMEBIDX%3AIT


On my Burgman 650  I also added this really cool lighted license plate frame from Radiantz. I got the black one with amber turns. It has LED's for the license plate (white) and I added a resistor and two diodes so the brake light also works as a running light. I will add it to my other bikes as I can afford, but I prewired for it while doing this project on the MyRoad.

https://www.radiantz.com/Real-Flex-Plate-Frame-3-p/00180-lp.htm

Yes sir I like those round reflector replacements. I went and bought the same ones you have but the problem I have is that the front ones are mounted on my fender and the fender is mounted to the wheel. I have not felt like doing that change yet. I will do it when I strip the bike down and repaint this coming winter.

But those are great upgrades.

I am going to be replacing my trunk strobes in a little while. The new ones will be many times brighter.

26
Xciting 500 / Re: LED lighting upgrade
« on: April 18, 2017, 07:27:46 PM »
Another great "how to" article! Very doable with the little lights of most bikes.

Karl

Thank you again Karl. When I do these I try to do them well.

27
Xciting 500 / Re: HID Upgrade to Xciting 500
« on: April 18, 2017, 06:08:03 PM »
I'm a little puzzled with cutting a hole in the boot (the one that goes around the bulb not the cover boot) to run wires. Most of those bulbs are two piece and you remove the bulb from the adapter (twist lock), then adapter goes into the headlamp housing first, then you put the boot back on around the adapter, and finally twist lock the bulb/wires back in. I can see what appears to be a green seal between the bulb/wiring part and the adapter. Nice having whiter light. I bought a HID years ago for one of my Burgmans but haven't put them in yet, wondering about LED now.

Interesting paint makes me think of Easter that just passed, nice.

This is really a simple explanation.
The boot that came with the HID did not fit the factory housing very well so I opted to use the OEM seal. Seeing that the OEM seal fit around the HID bulb base so good I decided that putting a small hole in the boot made more since then trying to run the wires out the OEM opening. I did this upgrade over a year ago and have not had a single issue with the lighting system.

This bulb comes apart like you state but this lay out worked better for this set up then doing it the other way. It may be different with another bulb.

I had completely forgot about that when I wrote this up and neglected to mention it.

28
Xciting 500 / LED lighting upgrade
« on: April 18, 2017, 05:58:43 PM »

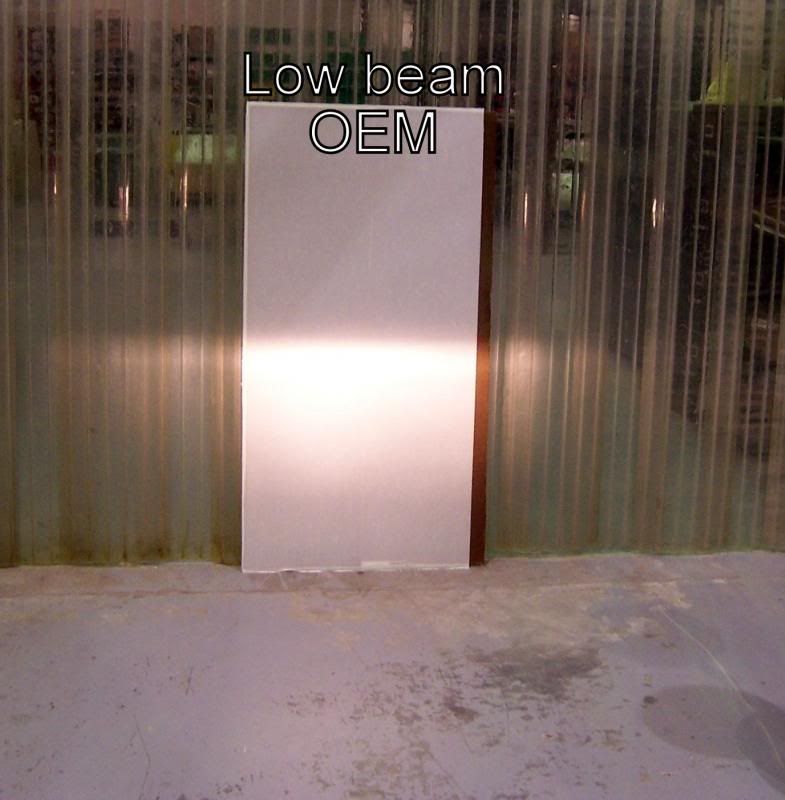
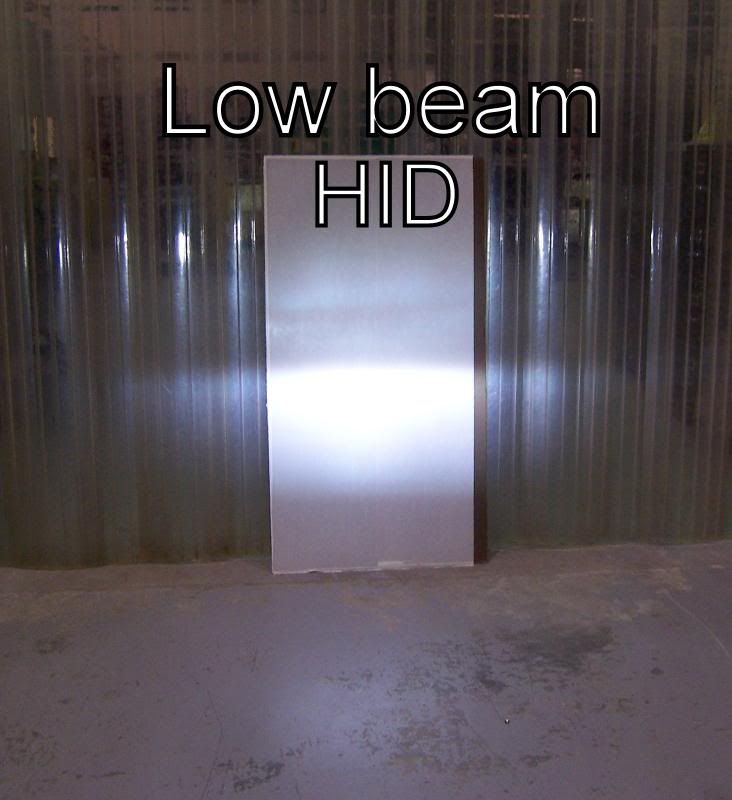
I have anothera new upgrade on my scoot. My last upgrade was a great HID headlight upgrade. Here is a link to that thread.
http://www.kymcoforum.com/index.php?topic=24316.0

Here I will be changing all other indicator lighting to LED's. I will also be changing the 1156 (single filament) outlets to 1157 (dual filament) outlets to make the switch back lights function as I need them to. I am not recommending specific parts. I will tell you that all parts came from eBay. No one sponsored a single part or opinion here. I paid for everything myself.

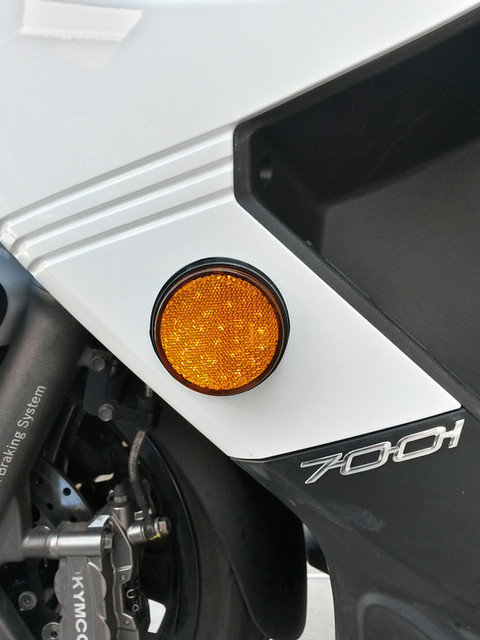
The Scoot is still the Kymco Xciting 500cc 2007 to 2010 version. However there is little difference in doing this job on any scoot. I did it to my other scoot a CF Moto E-Charm just before I sold it. The only challenging portion of this was the changing of the sockets that hold the bulbs from single to dual contact.

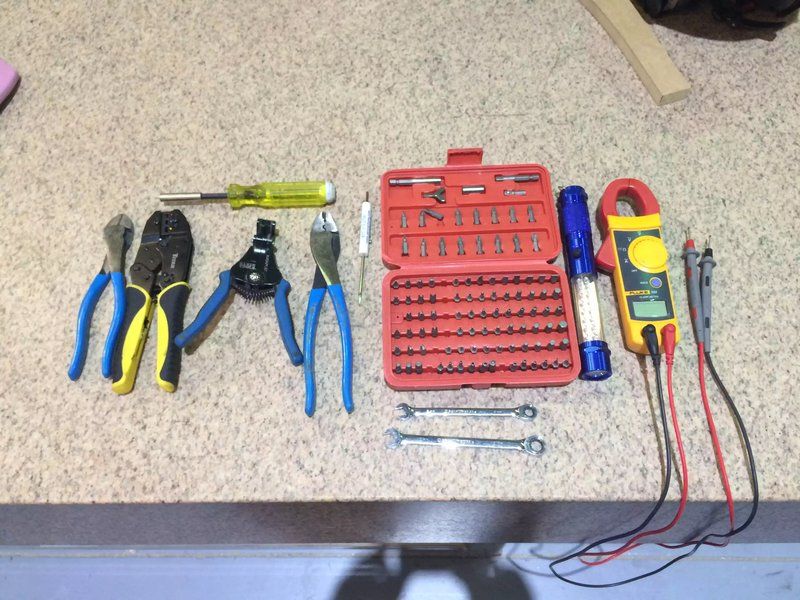
Well first you need a few tools. Here is a photo of what I used. Nothing fancy just the basics.


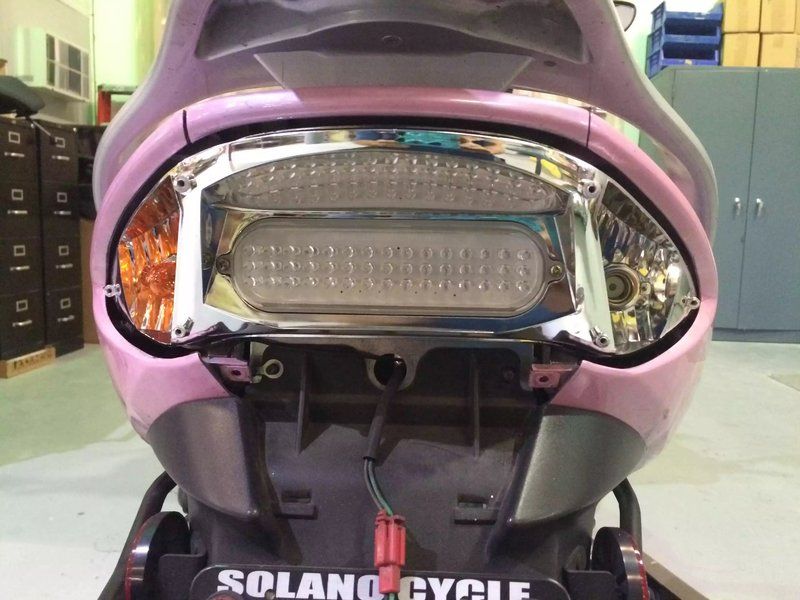
With my scoot I have a GIVI trunk and mount.  This was the first part that need to be removed because the support arms block the removal of the clear tail light lens and the seat and liner block all access to the bolts retaining the light. housing. Also it is clearly necessary to remove the seat and full under seat trunk liner.

With these out of the way I have clear access to all areas and can now start removing the light housing.


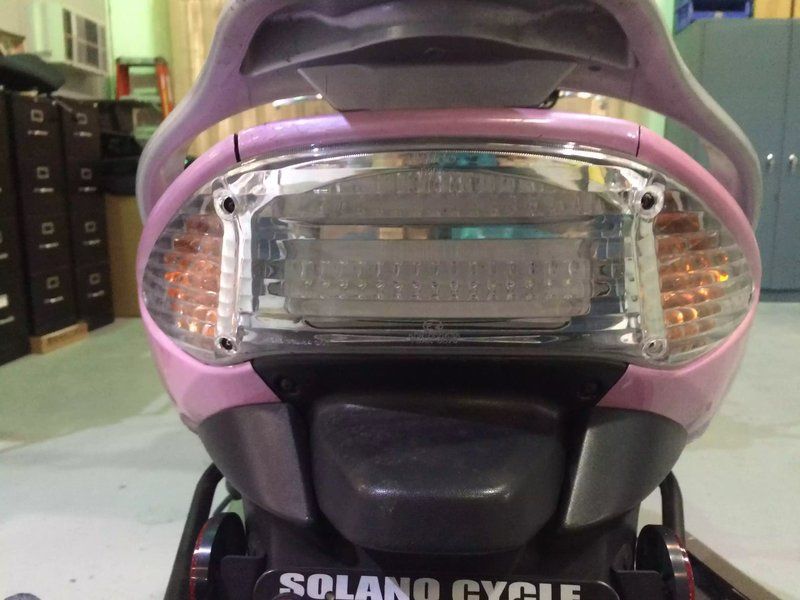
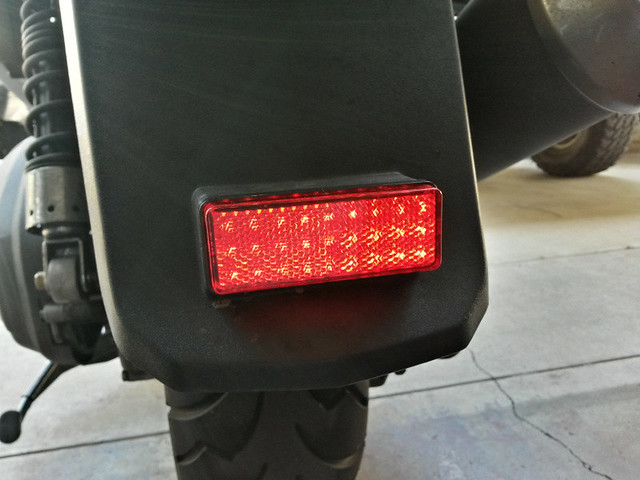
I already love the factory brake/tail LED array. Although this design is a bit dated as compared to what can be bought now it is still a very bright assembly that I will not be doing anything to.


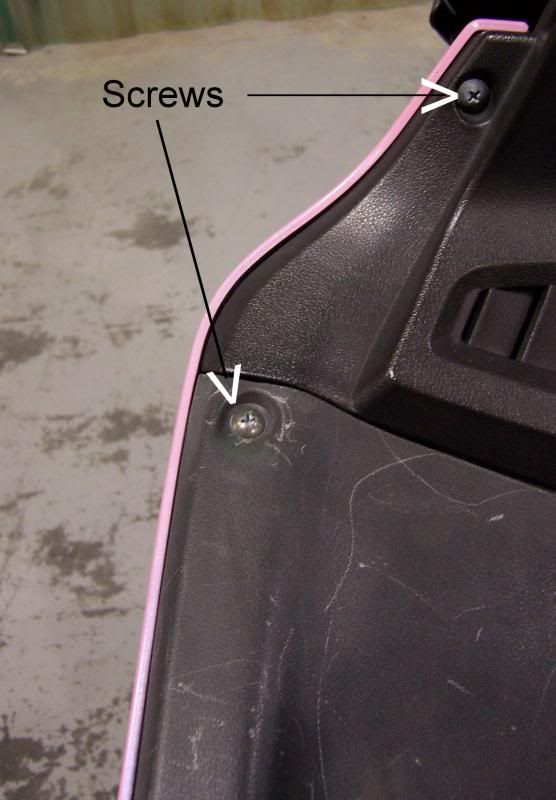
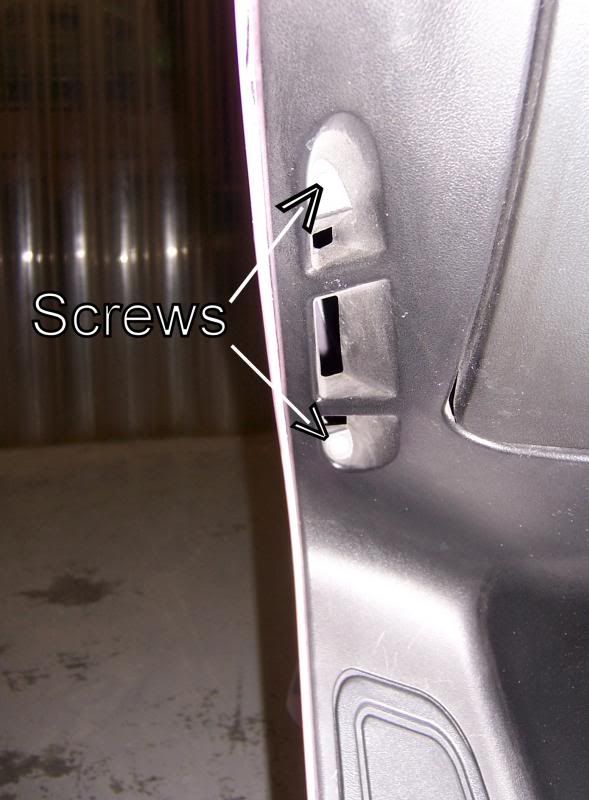
On the Xciting there are no less than 6 bolts you need to remove to allow the removal of the entire rear light housing. Very few of them are easy to get to. But full removal is necessary so you can perform all the work needed easily on your bench.


Once you get it free its time to go to the bench. On my scoot I have electrical connections going to my trunk, so the small cover panel had to come along also.


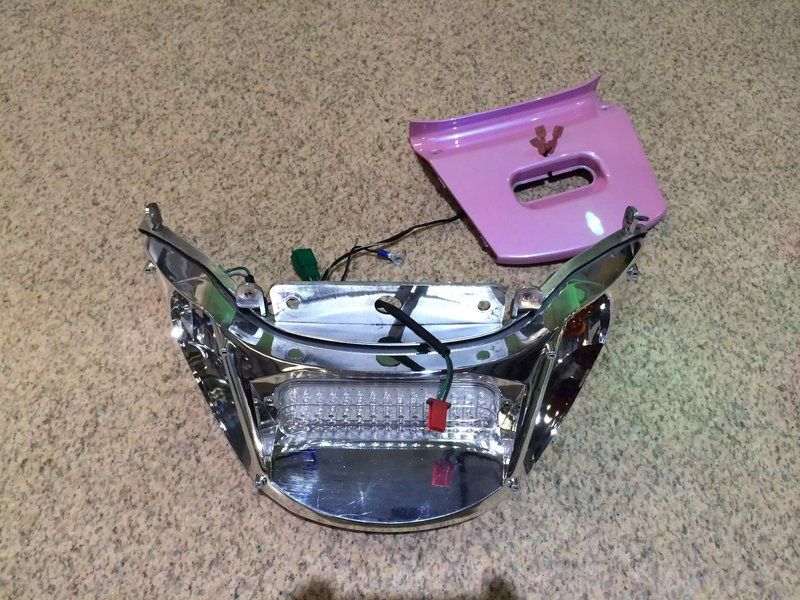
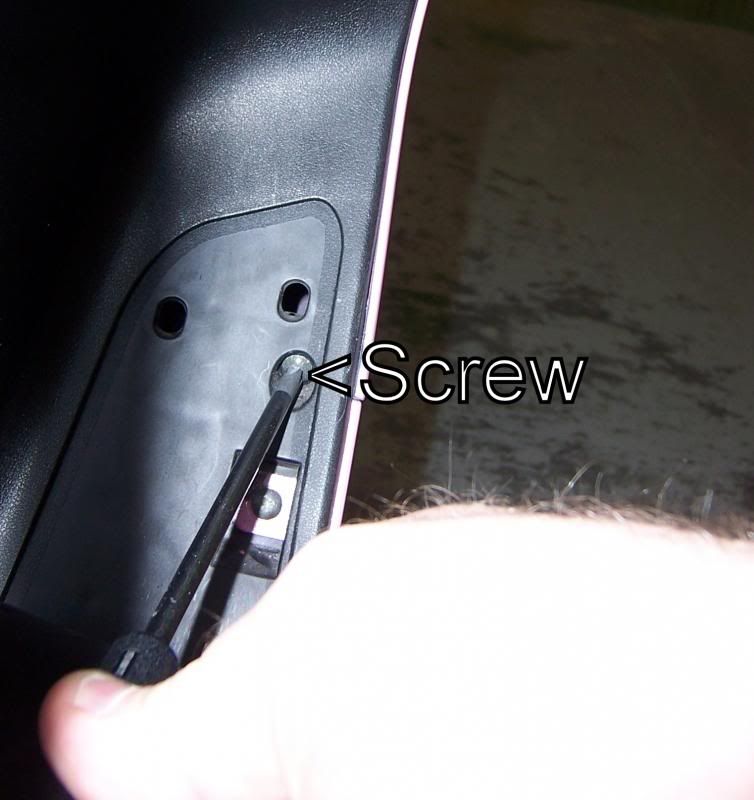
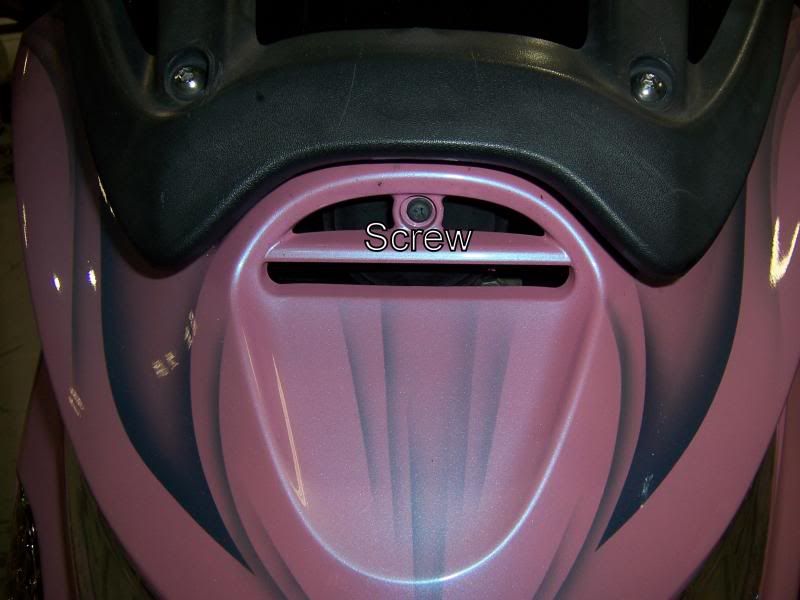
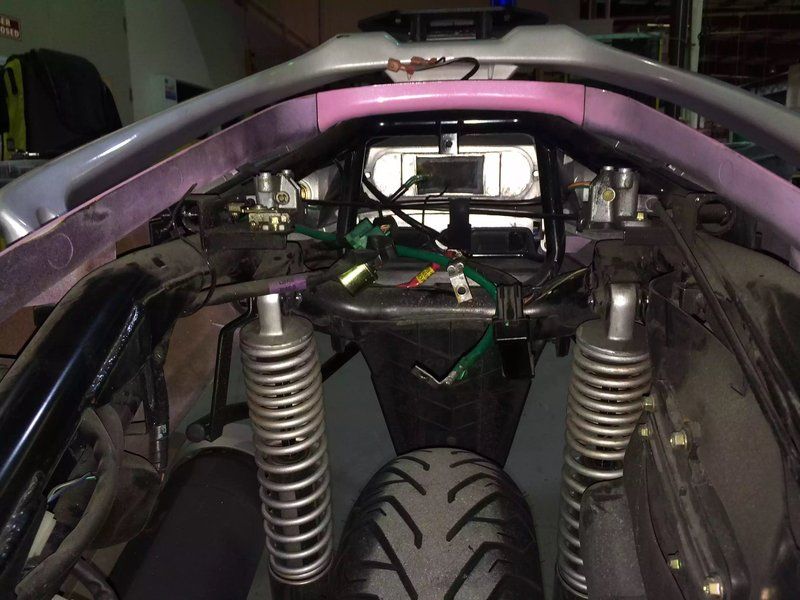
It is at this time I also removed the front of the scoot so I can also take it to the bench to modify the light sockets and to get to the flasher unit which also needs to be replaced.(If you need to see how to remove the front please look to my http://www.kymcoforum.com/index.php?topic=24316.0 thread as there are good instructions for the Xciting there.)

The factory flasher unit will NOT work with LED lights unless you go and add the resister packs that some recommend to use. I do NOT recommend you use the resistor packs as they take away one the biggest factors for using LED's, power savings.

Quick side bar here:

Many scooters, I believe all but the top brand scoots, design the electrical system to only provide about 5% or so above what the entire scooter needs for proper function. That means the electrical system is always working at about 95% of maximum. Anything you can do to lessen the load on your electrical system will pay off in much greater longevity of the system as a whole. By adding these matching resistors to the system you are adding extra current draw load to the system thus eliminating one huge advantage of LED's, far less power draw. This is why in my shop I have replaced 72 - HID lights that draw 450 watts each with 72 - LED lights that draw 180 watts each and give off 35% more light than the old HID lights. So I really suggest you DO NOT add load resisters to your system. Instead opt for changing the flasher unit to a LED compatible one. The unit I put in here is capable of handling 10 amps of current. So it will drive both LED and standard lights with no problem. Some of the LED flasher units have adjustable flash rates and some don't. I like the adjustable. they cost more but I think it is worth it.

Now the we have our parts on the work bench it is time for the technical part. This is not difficult really it just requires good attention to detail and time. Proceed slowly and methodically and this will work perfectly for you the first time.

Lets look at the bulbs I am using for this.

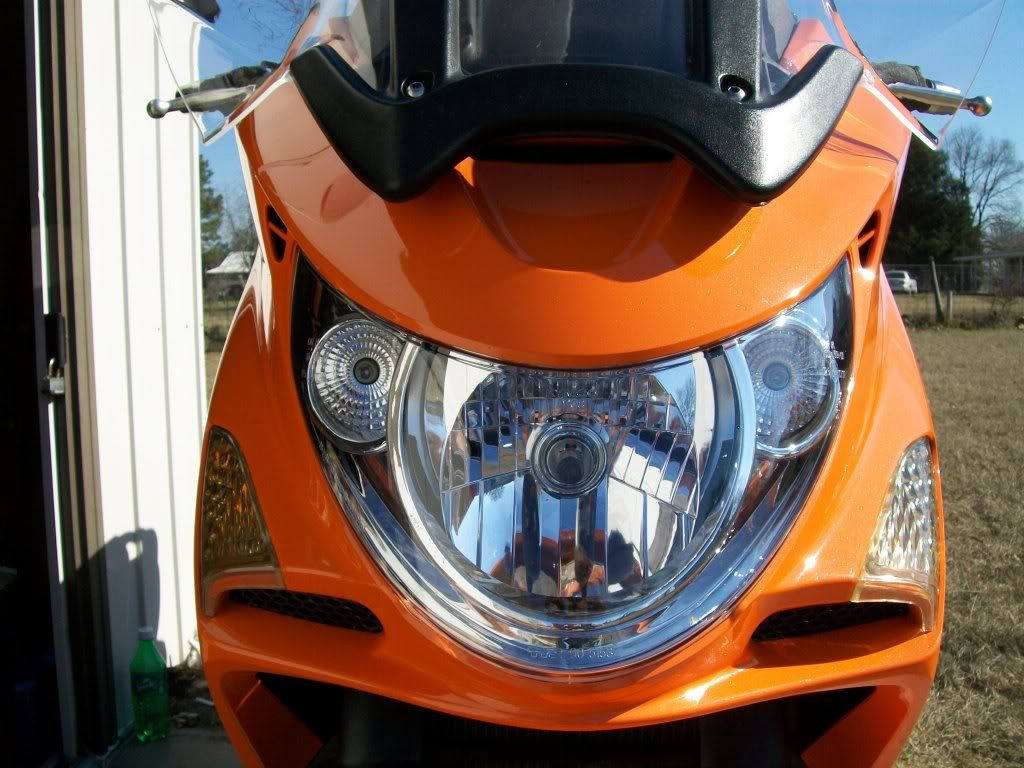
The front is getting set of white (6000K) / amber switch back LED bulbs. These bulbs will have a normal running of white giving much greater frontal illumination to the scoot in both day time and night driving. When you turn on the turning signal the white will shut off and the amber LED's will illuminate and the white will turn off. One second after the turn signal has canceled the white light will re-illuminate.

The rear is getting a pair of red / amber switch back LED bulbs. These I am wiring so they illuminate red when the brake is pressed and amber when the turn signal is used. These light up differently then the front light set. If you are just driving and turn on the turn signal they will light up and flash amber. If you are just driving and hit the brakes they will just light up in red. Now if you are braking and turn on the turning signal it will alternate red/amber/red/amber. As soon as you turn off the turning signal it will just remain steady red if the brake if still pressed. Now you can buy these to act like the front ones but I felt that the changing of the red to amber would garner more attention than just flashing amber. But you can buy either.

Also keep in mind that you could wire your rear lights to be running lights so they are always on. Or you can add a strober to the front lights causing them to flash like many older motorcycles have done with their headlights. It is up to you. All these options and more are just up to you. If you have any questions please email me.

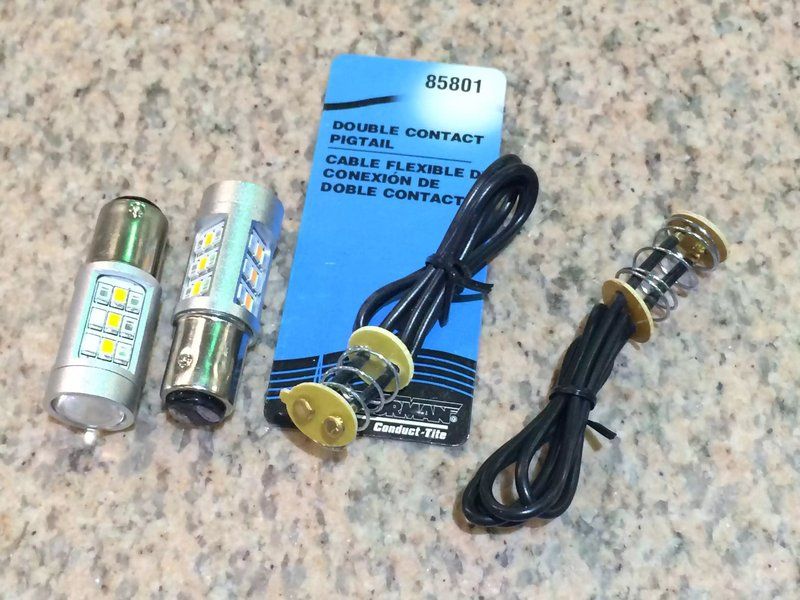
Here you can see the dual contact pig tails I bought and a pair of LED bulbs. These bulbs are the Red/Amber ones.


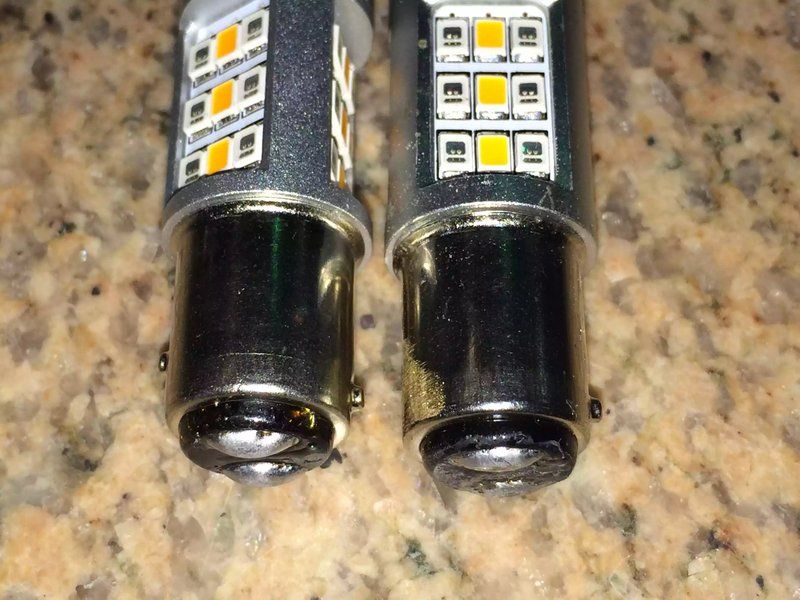
Seeing that we are going to be putting a offset bayonet 1156 bulb into a 1156 socket that in not made for off set bayonet we have to remove one of the bayonet nipples on the bulb base. this is easily done with a file and the use of elbow grease. Looking at the photo below you will see that the left bulb has both nipples while the one on the right has had one removed carefully. Don't worry, it will not come out as I have put over 500 miles on the bike since this mod was made with ZERO issues. So remove the nipple that is further from the bottom of the bulb.


I have since found a company that is making switch back LED bulbs that are dual contact but with the locking pins not offset. They were expensive. But I have seen their price drop about 30% in the last couple of months because they are selling more and more of them. So you can do this job either way as far as the mount goes.

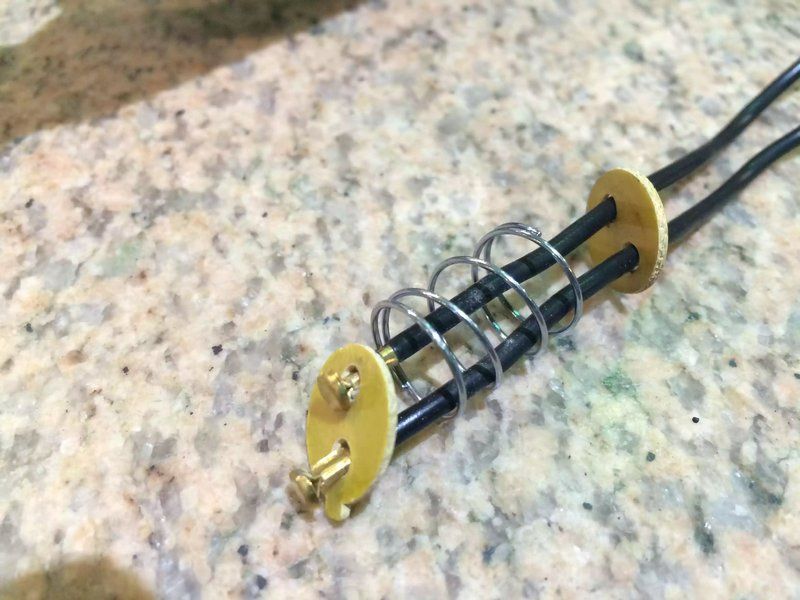
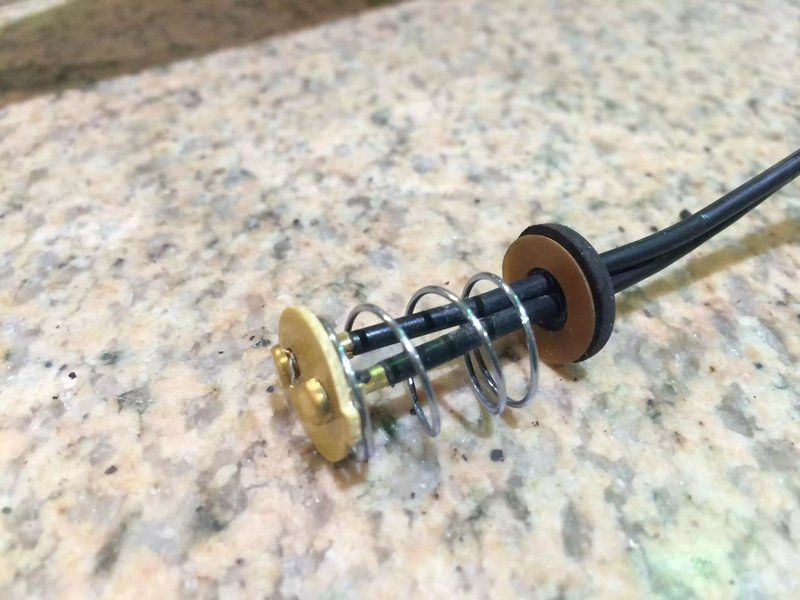
You will need to cut the wire that goes into the socket and remove the original pig tail.


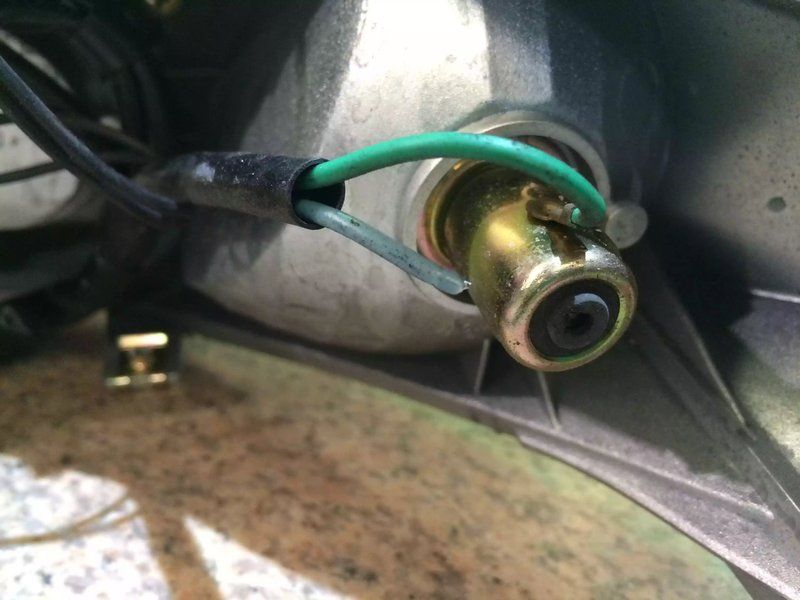
Now you can remove the spring loaded base from the socket.


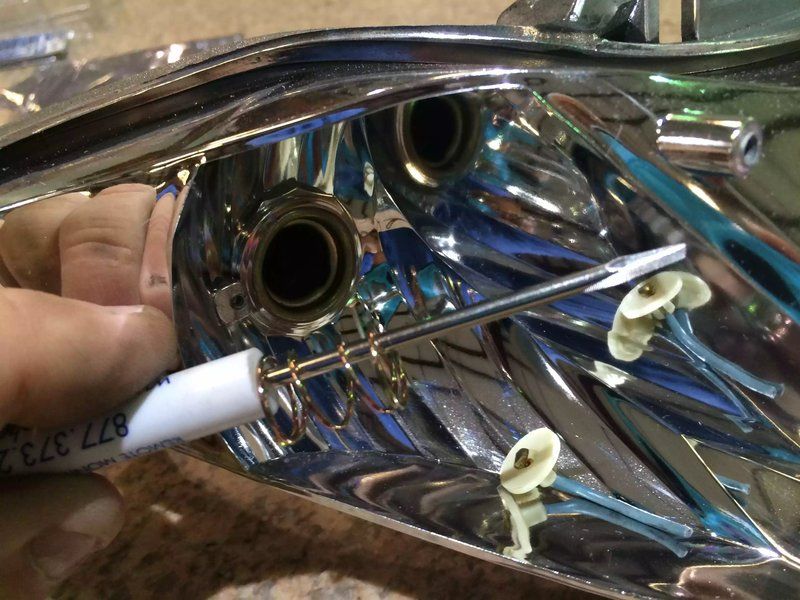
Now grab the dual contact pig tail you have and take the bottom fiberglass round part off and replace it with the bottom fiberglass and rubber seal from the pigtail you just took off the light housing.
Before


After


Now you have to understand how the dual pig tail needs to be orientated in the socket. Note the locking pin is 90 degrees to the contacts on the bottom of the bulb. Now in the socket in this light housing has the locking pins going vertical. This means that the pigtail contacts must line up horizontal. So sometimes this is easy, and sometimes it is not, insert the wires through the front of the socket and pull the contact base into the socket keeping the contacts horizontal. Below is a 1:30 video showing how I install the bulb at this point and figure out which wire powers each color.


Here is another 1:30 video that shows the connections and the testing.


Here is another 1:30 video showing both turn signals hooked up and the brake light circuit hooked and all tested.


Again as I said in the video seal your connections. Heat shrink, or self sealing connectors, or I like using self vulcanizing electrical rubber tape. If you leave this stuff open you are asking for problems down the line.

Now you have to do the same to the front just as you have done to the rear. I'm not going through all that here as the process is identical to what you did here.

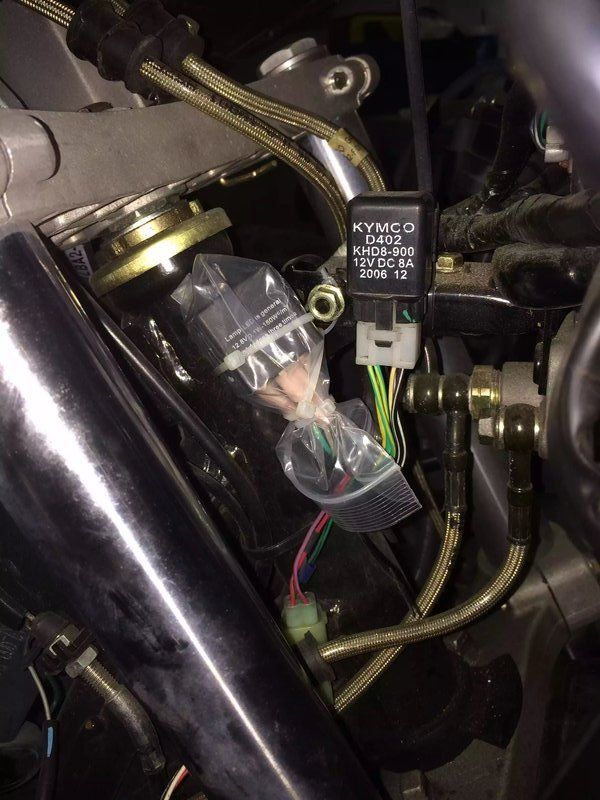
Here we have to now change the flasher unit.
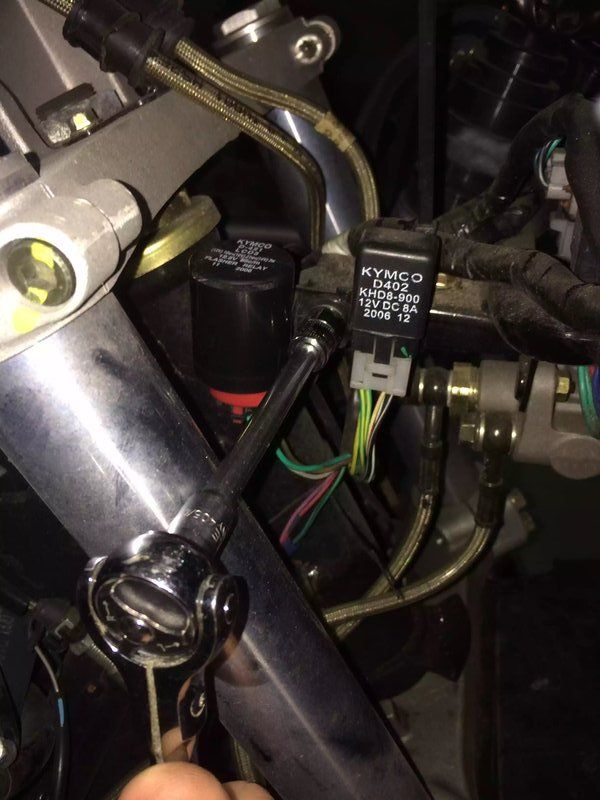
The flasher unit is located up front close to the forks.


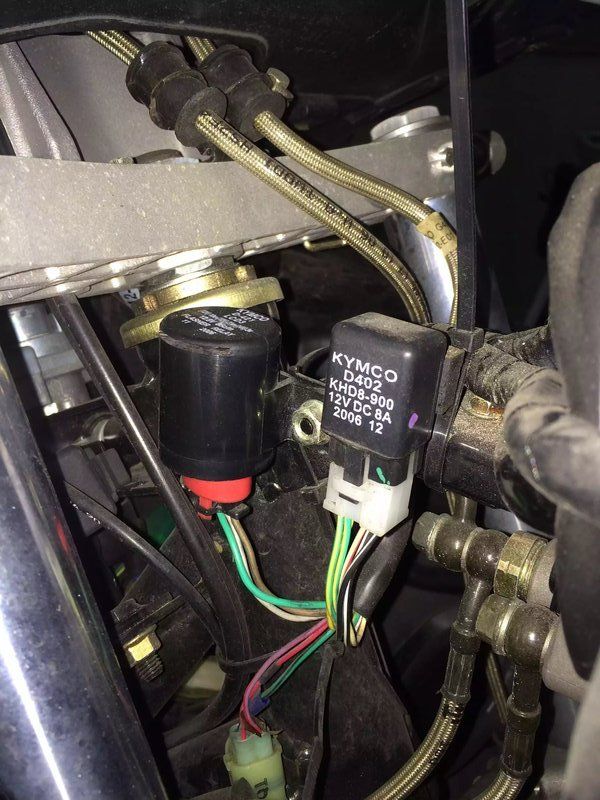
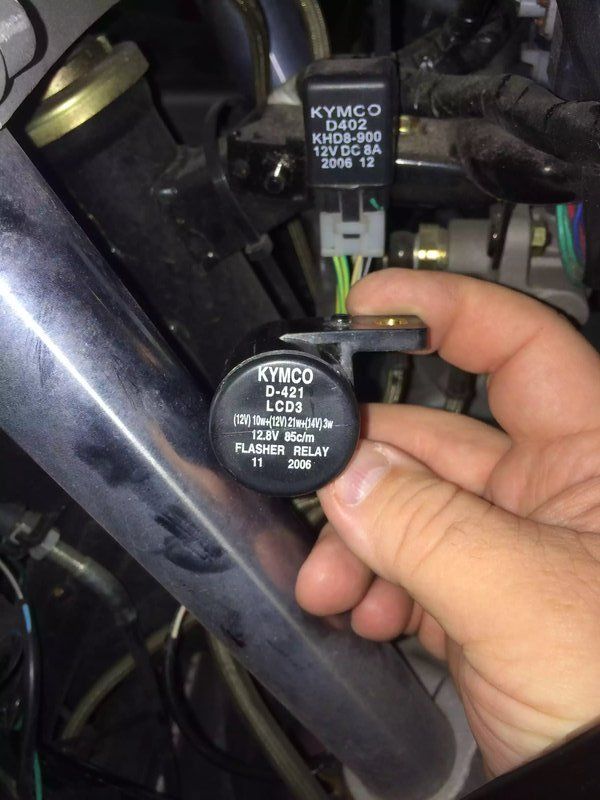
Kymco uses a is 3 wire flasher unit.


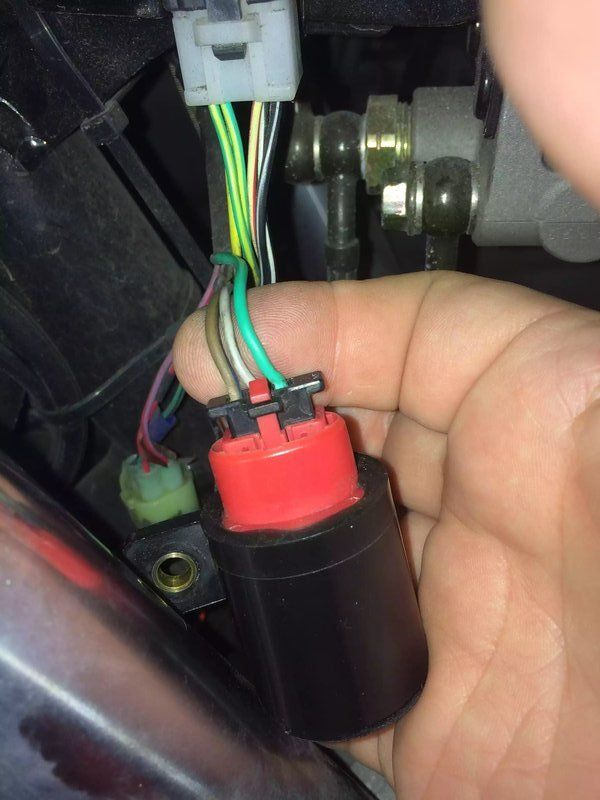
This is what the LED flasher unit I bought looks like. Notice how the unit is marked positive (+), negative (-), and load (L). Fairly self explanatory I think. Now you will have to use your meter to determine (or brake out the wire diagram you can download on line) what color wires are +, -, and the load. Now doing your Kymco Xciting please see the below photos this may help.


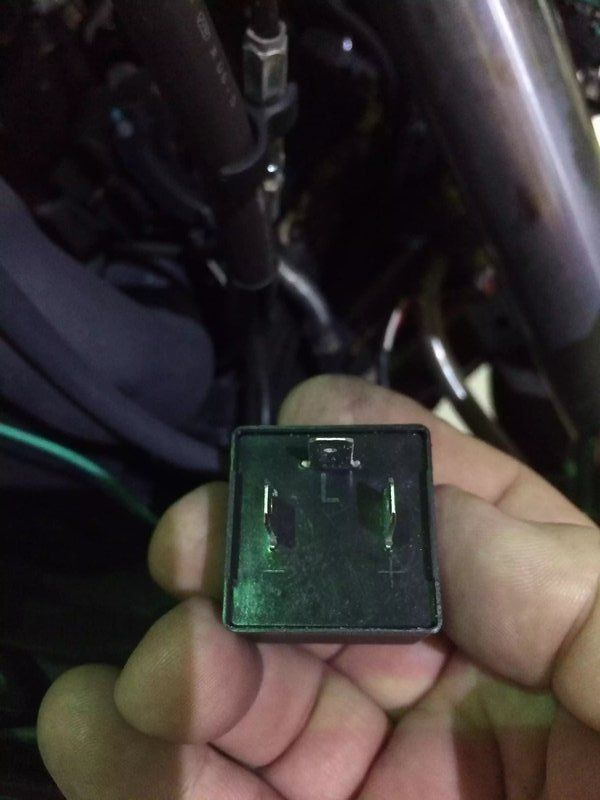
Also please take notice of the rod coming out of the top of the unit. This goes to the adjustment for how fast you want it to flash. No matter what the load is it will flash at the same rate. So install the rear lights and set your flash rate. You want to do this before the next step.


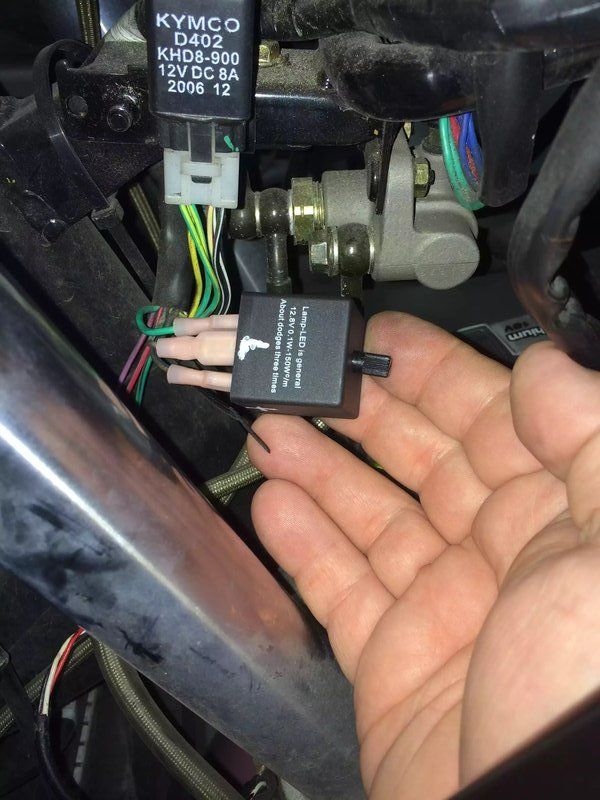
Here I put a plastic bag over the unit. Do not fully seal it. If you do try to fully seal it you will trap moisture in it and cause more problems down the road. This method allows it to be able to breath while protecting it from a drowning from the top. I have used this method many times and it works very good. Now I was unable to find an adjustable one that was water proof for less than around $45. So if you need to have a water proof one then pony up and pay for it. This unit was around $6.


At this point you can put the whole thing back together again because all you have done should be finished.

Here is a video of a walk around of my scoot with all the lights functioning and showing what they do.


If you have any questions please don't hesitate to ask below or email me.


29
Xciting 500 / Re: HID Upgrade to Xciting 500
« on: April 18, 2017, 04:54:14 PM »
Good presentation! Having great fun watching all the battle between HID and LED. Have not decided on anything yet.

Karl

Thank you for the kind words.

I have played with both and will continue to work with the LED's. The issue is for these retro fits LED's are not giving a smooth halo of light output. No matter what I have tried they have hot spots. The HID is just like the incandescent bulb in the fact that it emits a full ring of illumination that is smooth. For my sons Fiero I hand made housings using frenzil lenses with a straight parabolic reflector. Those work great. Better than any HID I have seen. But I have 200 or so hours in them. I am working on patenting the design otherwise I would show them to you.

My next post will be on changing all the other lights to LED's.

30
Xciting 500 / HID Upgrade to Xciting 500
« on: April 18, 2017, 04:00:24 PM »
Hello all. what I have here is a 45 minute upgrade that I feel anyone can do. This is simple and direct. If you can run a screwdriver you can do this with half your brain tied behind your back.

Here is the scooter with the OEM headlamp bulb installed.


First thing you have to do is locate all the screws that hold on the front faring of your bike. To make this easier I have photos of their locations. Please remove the front one last and install it first when going back together. Line up all the guides properly when going back together.


Be careful with the screws. I did brake one of the plastic threaded holes while tightening it too much. So use caution.

Now unplug the harness and then take your headlamp assembly to a large bench to work from. So here is the back side of the faring looking at the rear of the headlamp assembly.

Here I have installed the HID bulb already but you get the idea.


Here are the new and old bulbs going in and the next photo is of the wire harness that comes with the HID bulb. The bulb fits like a glove.


This is how I laid out the harness in the faring. I had to try 3 different times to get it right. The sub frame parts on the bike kept on getting in the way so this is where everything ended up.


Here is the front view once reassembled.


Now if you look here you will see the beam from old first then the beam from new.


These photos were take about 45 minutes apart inside my shop at about 11am and 11:45am. Bright and sunny outside here in Florida and no lights on in the shop. all ambient lighting is from skylights.

Here is the front view side by side.


Here is a link to the videos I shot both are less than 2 minutes. this is really a very easy install and the difference will be huge. I will post photos and videos during the night of the finished product.

! No longer available

! No longer available

Forgive all the background noise I was running the autoclave during all this and it is noisy even more so with the heaters on.

Here is the euro style headlamp housing. I plan on changing to this headlamp when I get a good price on one.


This is not my image. I am using it only to show the euro style headlamp housing.

In any event have fun and do this upgrade to your bike. Any questions don't hesitate to ask.


Pages: 1 [2] 3 4